This
technique has captivated my imagination and is a call to adventure for me. I was getting stuck in my over-fussy detail
and wanted to loosen up, so I tried learning this technique from a couple
different artists, and kind of made it my own.
The funny thing is, that I’m still fussy with detail, but pouring has an
element of being “out of control” in what the paint does, so I get to have a
bit of “controlled out-of-control-ness.”
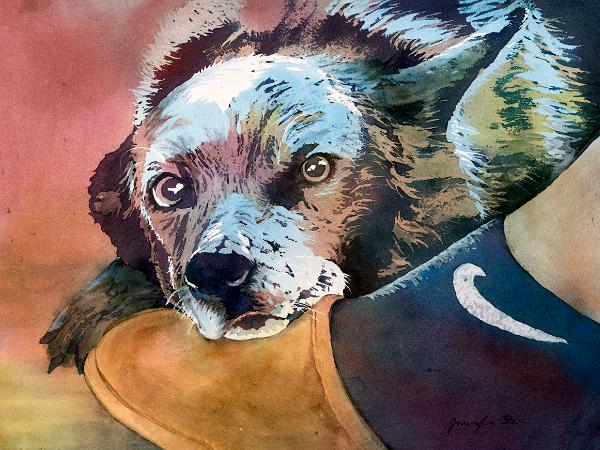
I identify the paintings in my gallery as “Watercolor Pour”
when I use this technique.
How it works.
1.
I find one of my photos that seems luminous with
lots of light and dark contrast. I
sketch it onto my watercolor paper
2.
I choose three colors as my triad palette. Most of the pours you see in my gallery are
my standard triad of Winsor Blue, Holbein Carmine and Daniel Smith Quinacridone
Gold, though I also love to use Daniel Smith’s Primatek Genuine pigments
because of their sedimentary nature.
3.
I create liquid watercolors by watering down two
consistencies of each pure pigment to resemble that of heavy cream (darker) and
skim milk (lighter).
4.
I get my paper wet with a big brush and start
with the lightest value first, usually the yellow, though all three get very
light when using wet on wet. By not
premixing the colors and pouring one at a time, they blend vibrantly on the
paper and do their own thing.
5.
I let the first pour dry completely. I use masking fluid to paint out the areas
that I want to preserve as lightest, and then let it dry completely.
6.
I continue to alternate pouring different layers
of paint and masking out the range of lights to mediums, building from light to
dark (drying completely between steps).
Some of these paintings have as few as three pours, and others have as
many as ten.
7.
When the darkest darks have been achieved, I
remove the masking fluid and it’s like Christmas! I never know what I’ll find because my memory
leaves out so much in the process, just being present to each step. Sometimes it’s scary and doesn’t work, and
most of the time it’s magical.
8.
I touch up, lift, soften edges, and direct paint
with the same watercolor pigments to finish the painting. The less direct
painting I do, the fresher these pours are to me.
Naturally there is more to it, and I’ve lost
many paintings in my attempts and learned along the way. I’ve had the privilege of teaching this
technique at Sagebrushers Art Society, and hope to do so again.
P A I N T I N G O N Y U P O:
Why Yupo?
I was
introduced to Yupo through the Watercolor Society of Oregon’s (WSO) Spring
Conventions and juried exhibits, where several artists were experimenting with
this unusual paper. My mother had been
having a wonderful time painting on Yupo and wanted to share it with me on a
visit to paint with her.
My very first attempt
at Yupo was sitting at her kitchen table, assuming I’d just be practicing
and learning how it worked. What came
out of it was a delightful painting, Forest
Magic, that became one of my favorites, and got juried in to the WSO Spring
Experimental Convention Exhibit in 2017.
I couldn’t believe it! I
attribute it to the fact that I wasn’t attempting to make a sharable painting,
so I had no constraints or inhibitions, which was ultimately a big lesson for
me!
I love the speed in
which this paper allows me to paint, drying quickly and creating effects
that are unique to Yupo. The beauty
(and danger) is that you can wipe off what you don’t like and start again,
particularly in saving whites and lights.
The brilliance of the white paper amplifies the vivid transparency and
colors are truly luminous. It’s great
fun, if you don’t get too attached to how you think it should go. It has a life of its own! Another adventure!
I identify these
paintings in my gallery with “on Yupo.”